In your day-to-day work with databases, it is essential to ensure that records accurately match your current resources.
You may need to exclude companies that are already in your systems from the data set or identify a specific group of entities for which data needs to be supplemented.
The "Filter Files" feature will enable you to effectively carry out these tasks, allowing you to fully customize the report based on your own lists of identifiers.
This way , you avoid retrieving unnecessary information and pay only for the records you actually need.
Step 1: Enable the feature
To ensure system performance, the filter file feature is disabled by default. This prevents the platform from becoming overloaded when users attempt to upload files that are too large.
If you would like to use this feature, please contact us at pomoc@mgbi.pl.
Step 2: Preparing the data file
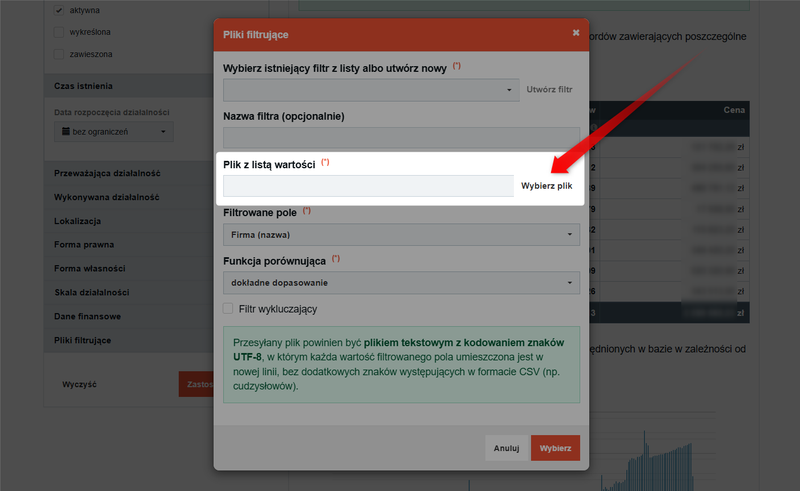
In order for the website to correctly match your data with the Business and People Database, the file must meet the following technical requirements:
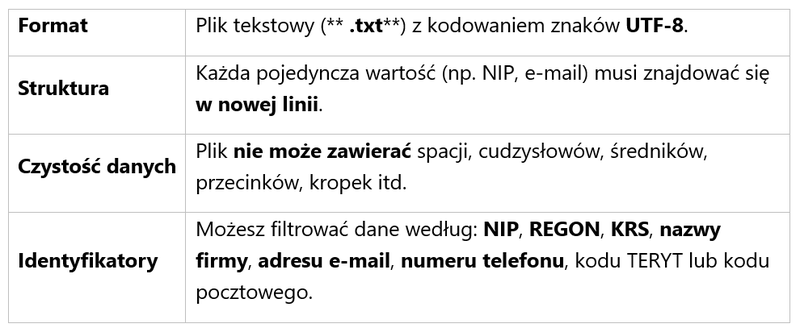
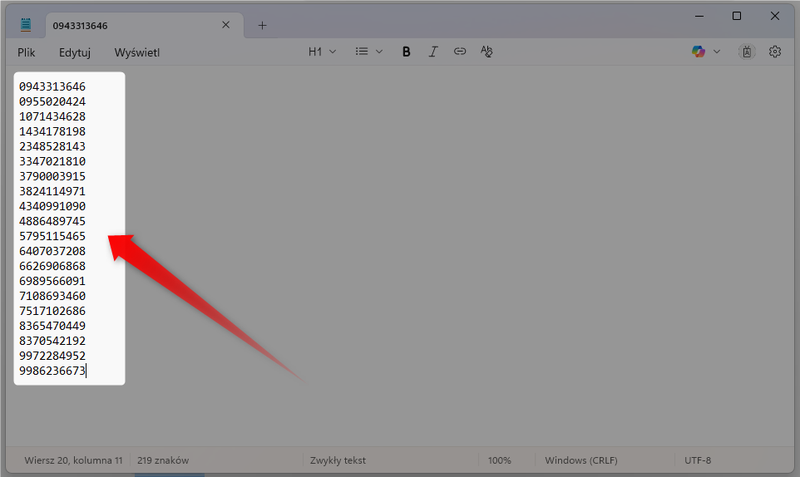
When preparing a filter file containing tax identification numbers (NIP), please note that a single identifier may be associated with more than one record. This is due to the nature of public registries, in which the same individual or entity may appear in different roles.
For example, a single person may be listed both as an entrepreneur registered in the CEIDG and as an individual farmer listed in the REGON registry, resulting in separate records assigned to the same number.
This rule also applies to other registration numbers and identifiers used in filter files (REGON, KRS, email address, phone number).
Step 3: Creating a filter
Once you've enabled the filter files feature in your account, you can use them at two different stages of the data ordering process:
A. When creating a new database (Wizard)
You can use multiple filter files at the same time, which allows you to deduplicate data from several sources.
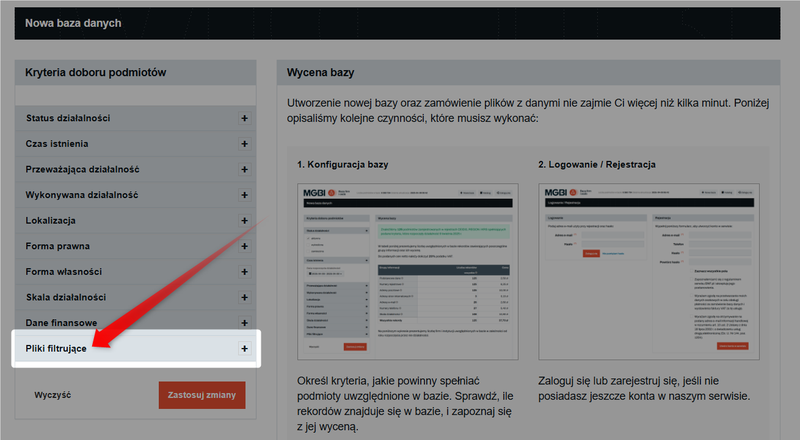
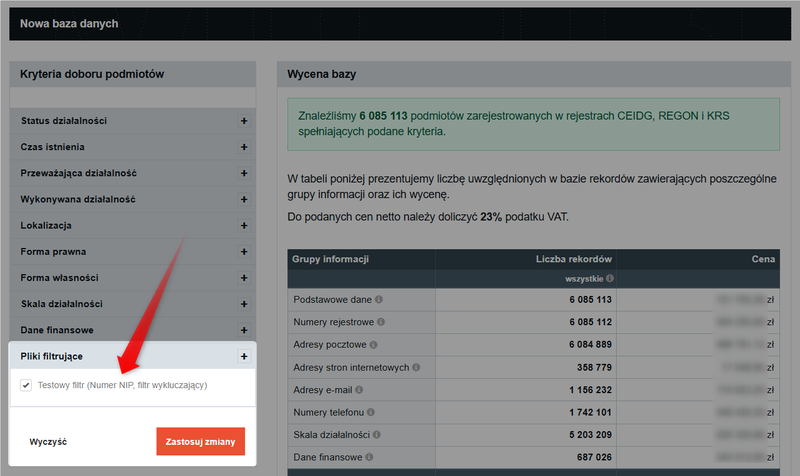
Go to the wizard and click the "Filter Files" tab in the side menu.
B. When creating a new report
Within the existing database, you can upload a maximum of one filter file.
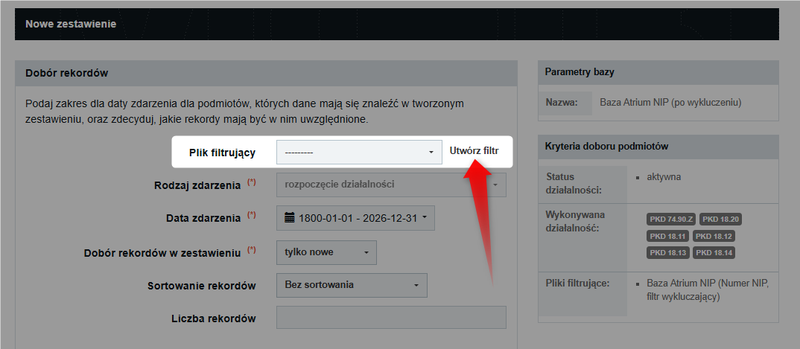
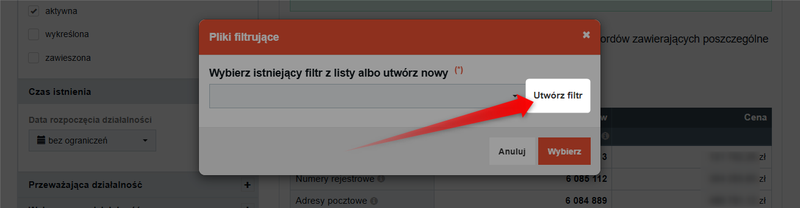
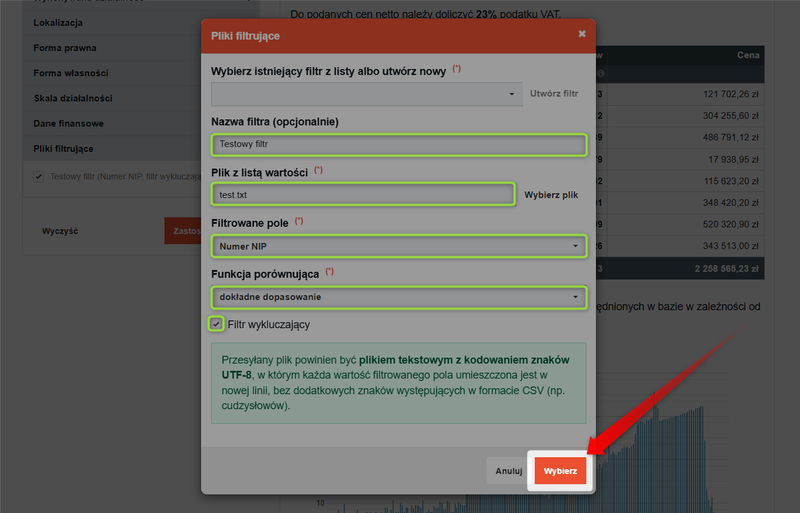
In both cases, after clicking "Create Filter," you'll see the full configuration panel for the new filter.
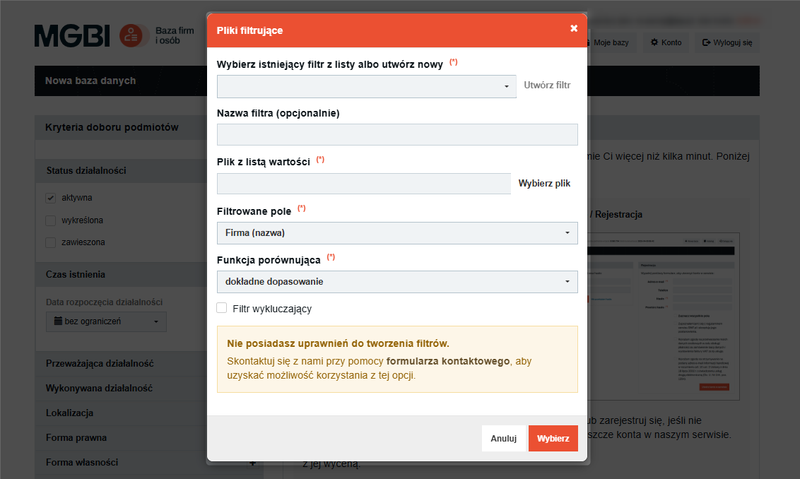
If you like, you can enter a name for the filter (e.g., "My CRM Database 2024") to make it easier to find later.
Click "Choose File" and upload the text document you have prepared.
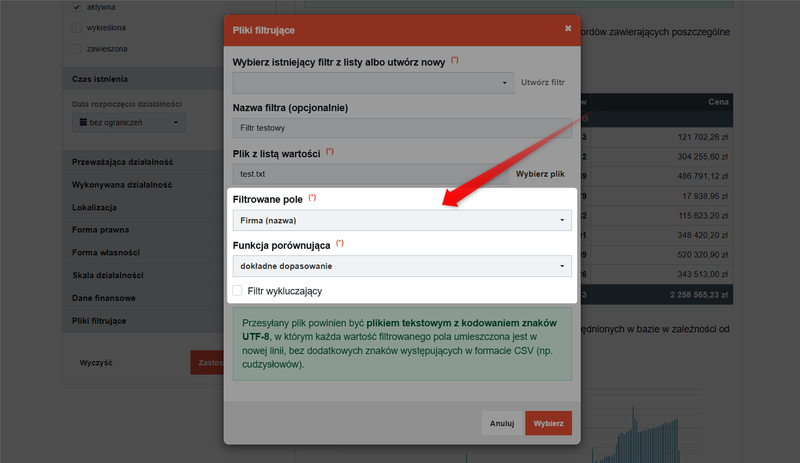
In the "Filtered Field" section, specify the type of data contained in the file (e.g., tax ID, company name).
Select "Comparison Function." This is a technical setting that determines how data from your file is compared with data in the Business and People Database.
- Exact match By selecting this option, you instruct the system to search for identifiers (such as tax ID numbers, KRS numbers, or email addresses) that are identical to those listed in your text file.
- Regular expression An alternative used less frequently, for example, when you want to find all companies with a specific email domain (e.g., "@gmail.com") rather than specific, individual addresses.
The "Exclusion Filter" option specifies what the system should do once it has found records based on your file.
- When you check this box, the system will act as a filter (deduplication). It will find records from your list and remove them from the search results. This prevents you from reordering data for companies that you already have in your CRM system, for example.
- If you leave this field blank, the system will act as a filter (Enrichment). It will limit the search results exclusively to records from your list. This is useful when you have a list of tax ID numbers and want to add the missing phone numbers or email addresses.
Once you've finished configuring the settings, click "Select," then "Apply changes."
The filter will be applied to your criteria, and the site will update the initial estimate and the number of records to reflect the specified filters.
Want to learn more about filtering options? Check out the guide: How to create a new database?