The Business and Individuals Database permanently stores every record you have previously purchased. You do not pay twice for the same information; the cost of your order covers only newly added data sets or entirely new entities that have been added to the registries since your last order.
The "New and Existing"option available in the new report wizard allows you to accurately supplement existing records with missing information—such as phone numbers, email addresses, or financial data—without incurring unnecessary costs.
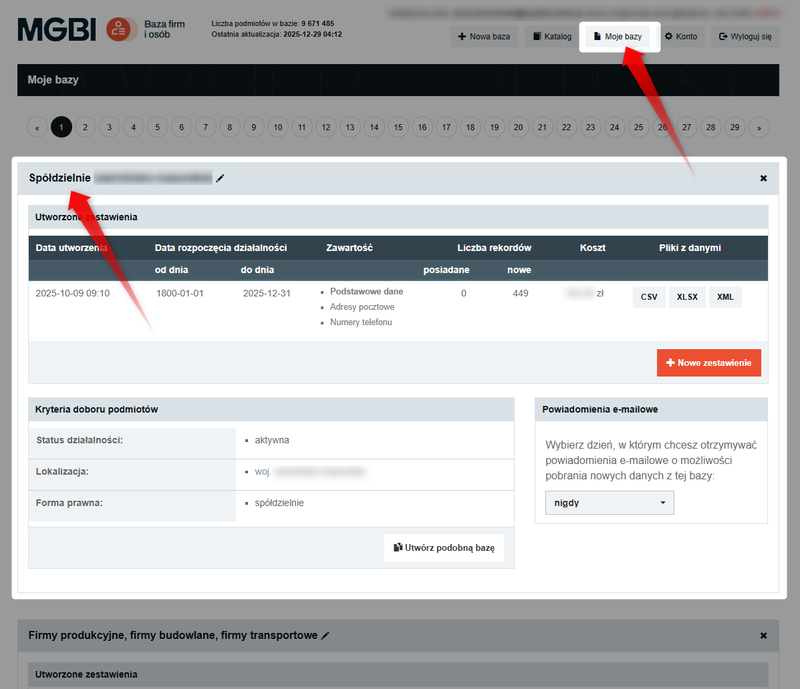
Step 1: Selecting a database
Log in to the site and go to the "My Databases"tab in the top menu. There you will find all the databases you have created so far. Find the database you want to add additional information groups to.
Step 2: Creating a summary
For the selected database, click the "New Report" button. The service will take you to the stage where you can generate a detailed quote and manage the scope of data.
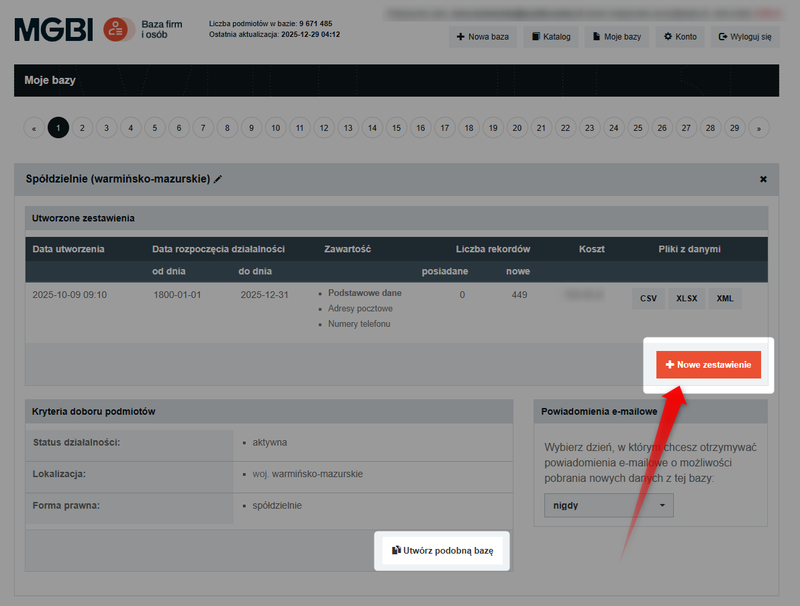
If you want to change the settings of the database itself (e.g., add a new industry or location), use the "Create a similar database" feature.
For more information on configuring databases, see the guide: How do I create a new database?
Step 3: Selecting records – “new and existing”
In the "Record selection in the report" section, expand the list and select the "New and existing" option.
As a result, the service will generate a file containing both the data for companies you have already purchased and the data for companies added to the registries since your last report was generated.
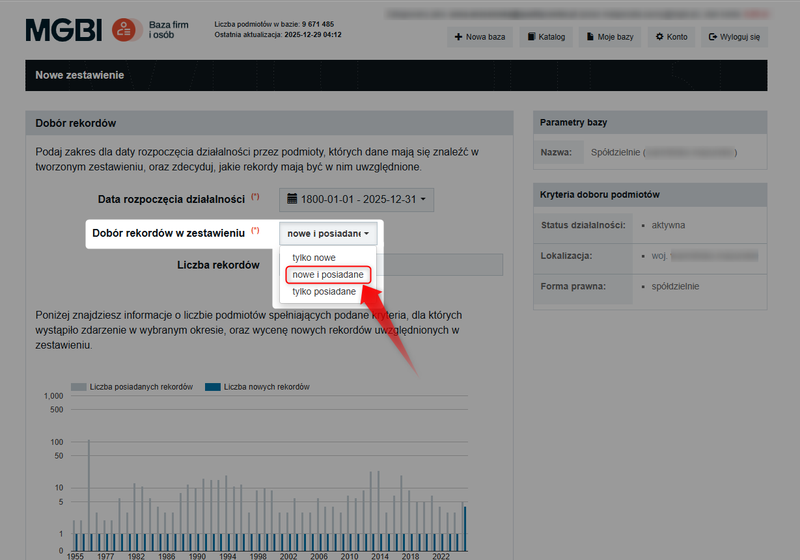
The service will automatically adjust the price downward by deducting the cost of the records you already own—you’ll pay only for the additional data (new information groups).
Step 4: Data selection – the "Required" function
This is the most important step for keeping the final cost under control. Follow these steps:
- In the"Information Groups"table, check the boxes for the fields you want to purchase (e.g., "Phone Numbers"),
- Check the box in the "Required" column.
Simply selecting a group (e.g., "Phone Numbers") will add it to the list, but only marking it as required will cause the system to reject records that do not contain this information.
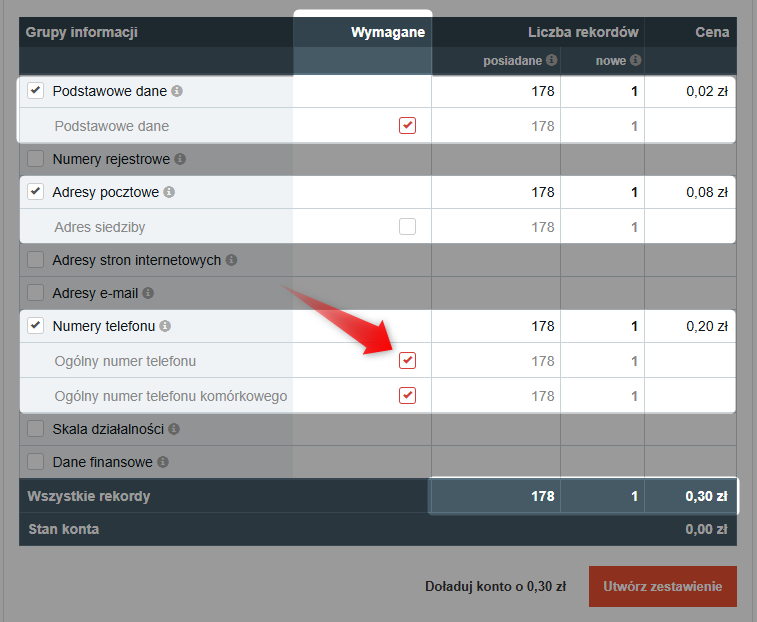
At least one information group must be marked as required for the service to provide a quote.
Step 5: Finalizing and exporting the file
Check the final cost shown at the bottom of the page and click“Generate Statement.”
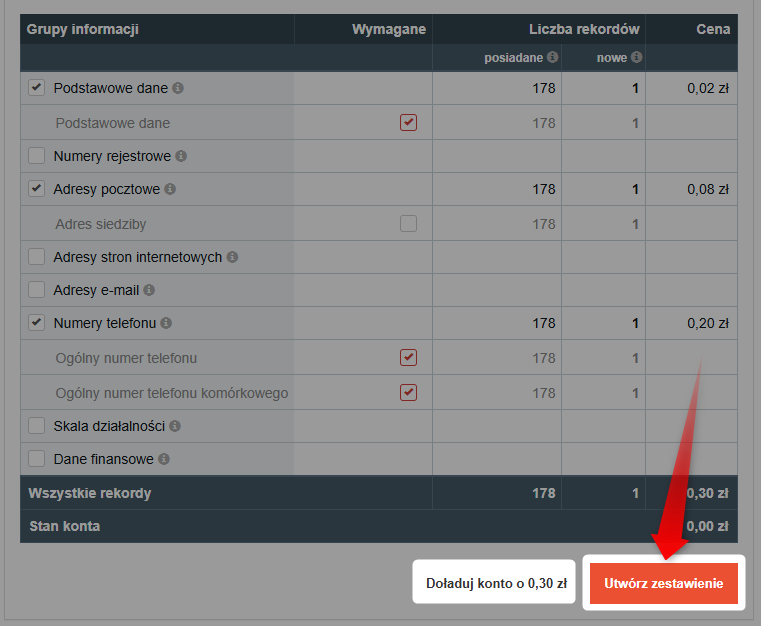
Is your balance low? Click the "Top Up Account" button. We've described the top-up process here: How do I top up my account on the website?
Once the transaction is confirmed, the system will redirect you to the "My Databases"section, where the files will be available for download for 30 days.
If your files expire, you can regenerate them for free by creating a new report using the "only owned" option.
The new list will appear in the "Created Lists" section within the database you selected at the beginning.
The new list will appear in the "Created Lists" section within the database you selected at the beginning.
We have described the data export process in the guide: How do I download the data files I ordered?