This new report is the second step in the data retrieval process, which follows the creation of the database.
It serves two main purposes:
- accurate cost estimation,
- ensuring that the database remains up to date without incurring additional charges for previously purchased records.
Once you've created a new database, you can start creating a new report within it. This is when you specify exactly what data you want to retrieve and set the final price.
Haven't created a database yet? Check out the guide: How to create a new database?
Step 1: Go to the new statement wizard
The Business and People Directory offers two ways to access the new report wizard:
A. Immediately after creating the database ("from scratch")
After setting all criteria (PKD, Location, Legal Form, etc.) and clicking "Create Database," the system will prompt you to log in or register an account.
After logging in, you will be automatically redirected to the "Create New Report" screen.
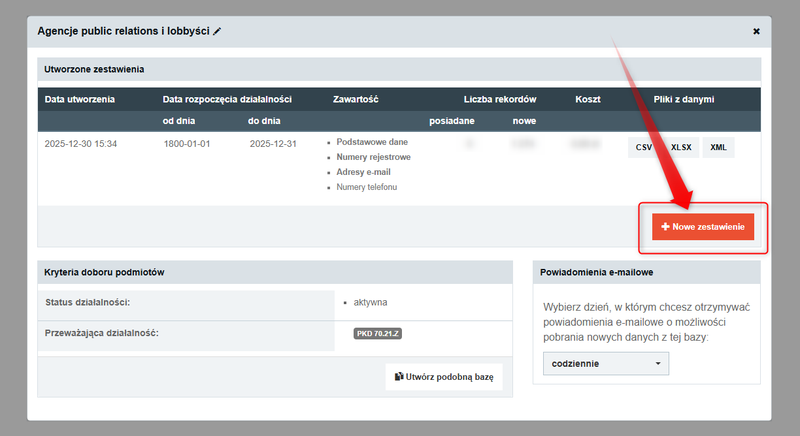
B. Through the "My Databases" section
If you want to update a database you already have (purchase additional data or download new records), select the "My Databases" option from the menu. Then, for the selected database, click the "New Report" option.
Step 2: Selecting records in the report
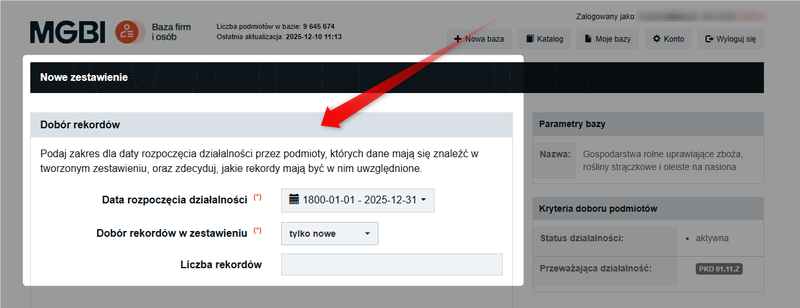
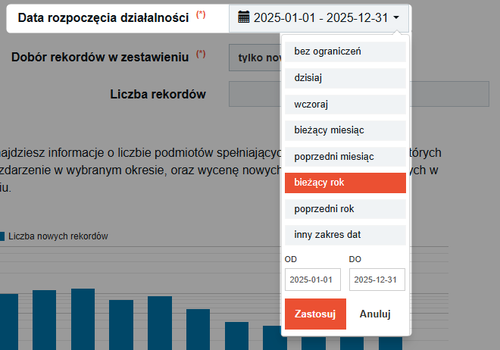
In the "Record Selection" section, you can specify, among other things, which records should be included in the generated file. Select the date range for the start of business operations for the entities you are interested in.
To reach companies planning to start a business, set the end date range a few months in the future.
The service includes records with a future start date, as public registries allow such a declaration to be made at the time the registration application is submitted.
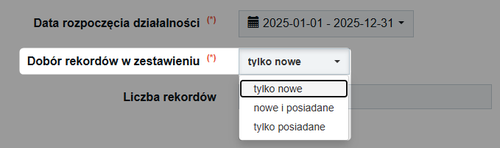
Before you make your choice, it’s worth explaining how the service distinguishes between records:
- A new record —one where you haven't purchased a single set of data yet.
- Record in your collection – if you have ever requested even basic data from a given record in the past, it is permanently added to your collection of records.
Select one of the options for filtering records in the list:
The service keeps track of which records have already been purchased, so you don't have to pay twice for the same data.
Step 3: Detailed quote (required)
This is the most critical step for controlling the final cost and scope of the data. From the general, maximum estimate you saw in the Wizard, you move on to a precise estimate based on data quality.
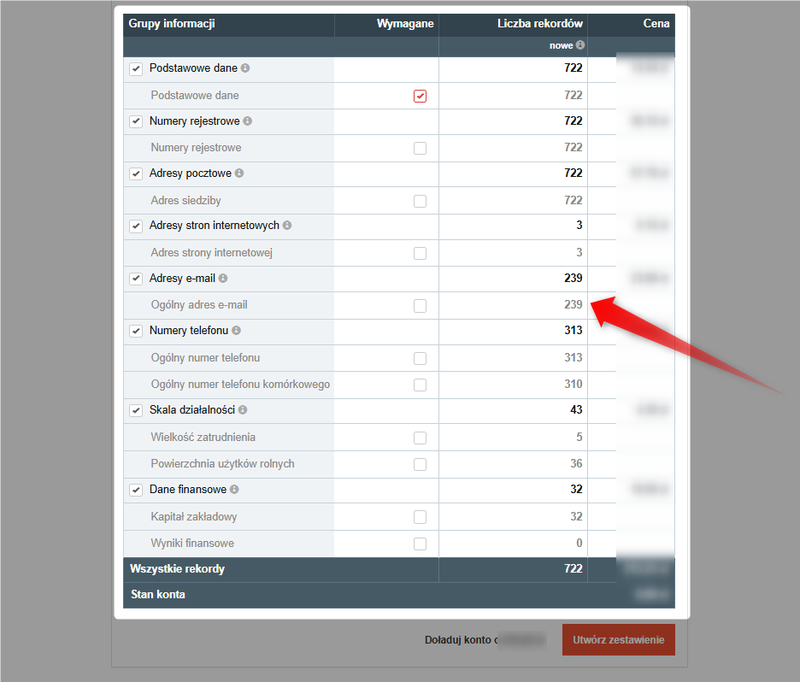
This view displays "Information Groups" (e.g., Basic Information, Email Addresses, Phone Numbers, Financial Information).
The price of a single record is the sum of the prices for all selected data groups.
You can actively manage the final price of the quote using the "Required" feature.
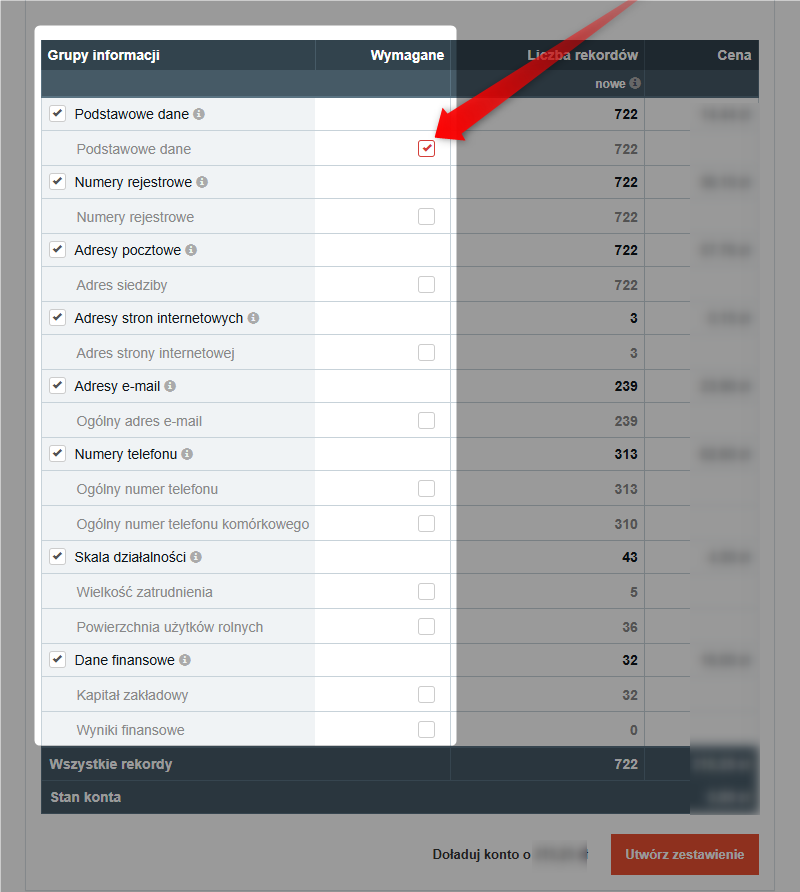
Once you mark a set of information as required, the system will automatically recalculate the statistics for the database and reduce the number of records in the summary, retaining only those that contain all the required data.
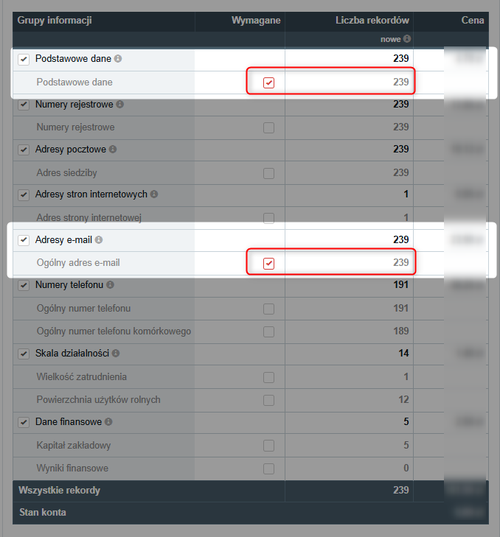
For example, when the "General Email Address" field is set as required, the number of records included in the quote decreases from 722 to 239, as only that many entities have this information.
The final cost is 30% of the original estimate.
The " Required " field must be selected for at least one information group.
Step 4: Payment and Creation of the Statement
The process of purchasing data on the website is based on a "prepaid" (wallet) model. This means that in order to complete your order, you must have sufficient funds in your account.
Once you have specified the exact scope of the data to be included in the report, the total cost for all records will be displayed at the bottom of the page.
The service will compare the cost of your order with your current account balance.
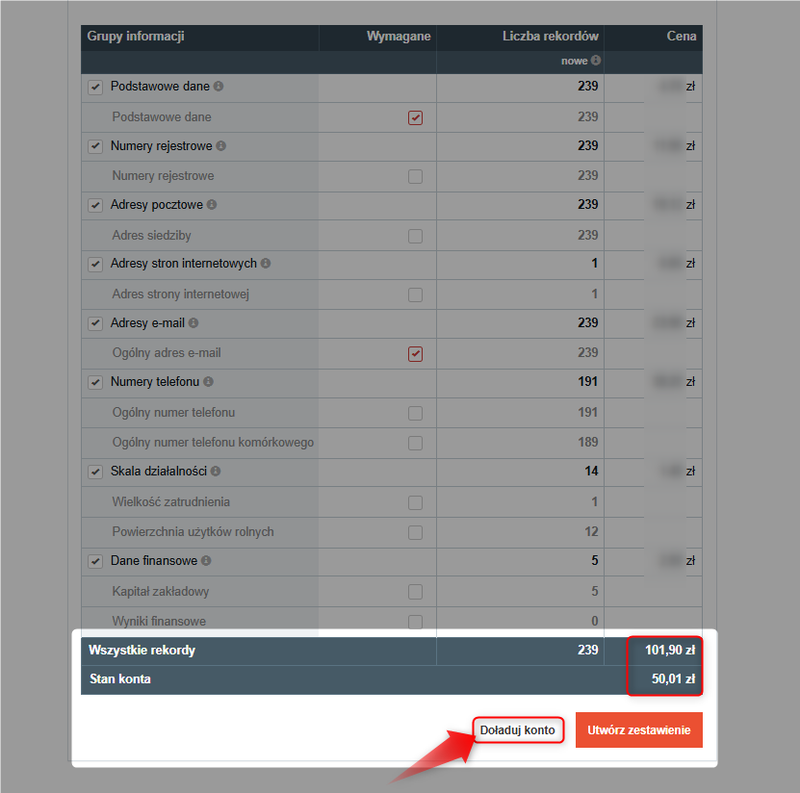
➡️ If you don't have enough funds, click the "Top Up Account" button. You will be redirected to the payment form.
You can find a detailed description of this process in the guide: How do I add funds to my account on the website?
➡️ If you have sufficient funds, proceed directly to checkout. Click the "Create Statement" button. The website will ask you to confirm the transaction.

Once the transaction is confirmed, your account will be charged, and the service will save the new statement.
For more information, see the instructions: Top-up while creating a statement.
Step 5: File Accessibility
Once the report has been successfully generated and your account has been charged, the website will automatically redirect you to the "My Datasets"section, where the data you ordered will be ready for download.
Keep these two key rules in mind:
- You can download the files for 30 days after they are created.
- Once the files expire, you can regenerate them.
For a detailed description of the data download process, please refer to the guide: How do I download the data files I ordered?